How to Make a Vintage Junk Journal: A Step-by-Step Guide 🗒️✂️📚
How to Make a Vintage Junk Journal: A Step-by-Step Guide for Beginners 🗒️✂️📚
Ever found yourself staring at an old book, wondering how to breathe new life into it?
Well, you’re in for a treat!
Today, we’re diving into the wonderful world of vintage junk journals, guided by the expertise of Pamela from The Paper Outpost.
Get ready to transform that dusty old tome into a stunning, personalized masterpiece!
Why Should You Make a Vintage Junk Journal? 🤔
Before we roll up our sleeves and get crafty, let’s address some common questions and concerns:
- Feeling intimidated by blank pages?
- Worried about “ruining” a perfectly good book?
- Not sure where to start with junk journaling?
- Overwhelmed by all the fancy techniques out there?
Trust me, I’ve been there too!
But here’s the secret: junk journaling is all about embracing imperfections and letting your creativity run wild.
There’s no right or wrong way to do it, and that’s the beauty of it all!
So, why should you give vintage junk journaling a try?
- It’s a fantastic way to upcycle old books and papers.
- You’ll create a unique, personalized journal that reflects your style.
- It’s a relaxing and therapeutic creative outlet.
- You’ll learn new crafting techniques along the way.
- It’s a great way to preserve memories and ephemera.
Ready to jump in?
Let’s get started! 🏊♀️
What Do You Need to Get Started? 🛠️
Pamela’s got us covered with a list of supplies.
Don’t worry if you don’t have everything – you can always improvise or add to your stash as you go along.
Here’s what you’ll need:
- An old hardcover book (Pamela used a 1939 College Algebra book – how cool is that?)
- Craft knife or X-Acto knife
- Metal ruler (for guiding your cuts)
- Glue (Pamela recommends Fabri-Tac, but any strong craft glue will do)
- Tyvek tape or strong packing tape
- Embroidery floss
- Large-eye needle (like a darning needle)
- Scissors
- Decorative papers (old book pages, scrapbook paper, etc.)
- Ink for aging (optional, but fun!)
- Bone folder (optional, but helpful for crisp folds)
Got everything?
Awesome!
Let’s dive into the fun part. 🏄♀️
How Do You Prepare the Book Cover? 📘
First things first – we need to transform that old book into a blank canvas for our junk journal.
Here’s how Pamela does it:
- Choose your book wisely. Look for something with a sturdy cover and an interesting title or design. Pamela’s 1939 College Algebra book is perfect because it’s got character and history.
- Stand the book upright and hold back the covers (Pamela calls them “wings”). This will reveal the gap between the text block and the spine.
- Grab your craft knife and take a deep breath. We’re going to carefully separate the text block from the cover. Here’s the trick:
- Angle your knife towards the text block, not the spine.
- Go slow and steady – no need to rush!
- Cut along the inside of the cover, following the natural gap.
- Be extra careful not to cut through the spine. If you do nick it, don’t panic! We’ll fix it later.
- Once you’ve cut along both sides, gently remove the text block. Voila! You now have a blank book cover ready for transformation.
Pro tip from Pamela: If you’re nervous about cutting, practice on a less precious book first.
It’s all about building confidence!
How Do You Reinforce the Spine? 🦴
Now that we’ve got our blank canvas, it’s time to make sure it’s strong enough to handle all the junk journal goodness we’re going to throw at it.
Pamela’s secret weapon?
Tyvek tape!
- Cut a piece of Tyvek tape (or strong packing tape) slightly longer than your spine.
- Carefully apply it down the center of the spine, making sure it’s straight and smooth.
- If you want extra strength (and who doesn’t?), add a couple more pieces of tape, overlapping them slightly.
- Use your fingers or a bone folder to smooth out any bubbles or wrinkles.
Pamela’s pro tip: If you accidentally cut through the spine earlier, this tape will save the day.
It’s like magic tape for book surgery! 🧙♀️
How Do You Cover the Spine? 🎭
Now, I know what you’re thinking – “But won’t that tape look ugly?”
Fear not!
Pamela’s got a trick up her sleeve to make that spine look vintage-chic:
- Find a piece of fabric that vibes with your journal’s theme. Pamela used an old vintage napkin – how’s that for upcycling?
- Cut the fabric slightly larger than your spine area. It’s better to have too much than too little!
- Here’s where it gets fun: Pamela coffee-dyed her fabric for that perfect vintage look. Just soak it in strong coffee, squeeze it out, and let it air dry. Your house will smell amazing, trust me!
- Once your fabric is ready, apply a generous amount of glue to the spine.
- Carefully place your fabric over the glued spine, smoothing it out as you go.
- Trim any excess fabric, leaving a little overhang for that perfectly imperfect vintage look.
Pamela’s style tip: Don’t worry if it’s not perfectly smooth or even.
Those little imperfections add character and charm to your journal!
How Do You Create the Inner Spine? 🧠
This is where the magic really happens.
The inner spine is what will hold your signatures (groups of pages) together.
Here’s Pamela’s method:
- Cut two pieces of thin cardboard (cereal box thickness works great).
- Glue these pieces together for extra strength.
- Measure the width of your book’s spine and cut your cardboard to fit snugly inside.
- Now for the fun part – decoration! Pamela used ink to give her inner spine a vintage look. You could also use:
- Stamps
- Paint
- Collage
- Stencils
- Want to add some extra pizzazz? Pamela used gilding wax around the edges for a touch of metallic glamour.
Remember, this inner spine will peek out between your signatures, so make it pretty!
How Do You Prepare Your Signatures? 📄
Signatures are the heart of your junk journal.
They’re groups of pages that you’ll sew into your book.
Here’s how to prep them:
- Gather a variety of papers. Pamela used:
- Coffee-dyed papers for that vintage look
- Old book pages
- Scrapbook paper
- Plain paper for writing
- Fold each paper in half. Use a bone folder or your fingernail to create crisp folds.
- Group your folded papers into signatures. Pamela recommends 3 signatures with about 10-15 pages each.
- Mix and match your papers for visual interest. Pamela even threw in a watercolor print – how cool is that?
Pamela’s creative tip: Add some surprises in your signatures!
Tuck in envelopes, fold-out pages, or even a secret pocket or two. 🕵️♀️
How Do You Attach the Signatures? 🧵
This is where it all comes together – literally!
We’re going to sew those beautiful signatures into your book.
Don’t worry if you’re not a sewing pro; Pamela’s method is super easy:
- Use your inner spine as a template to mark where you’ll punch holes in your signatures. Pamela recommends 3 holes.
- Punch holes in your signatures using a crop-a-dile tool or an awl. If you’re using an awl, place your signature on an old phone book or stack of scrap paper to protect your work surface.
- Thread your needle with embroidery floss. Pamela uses a nice long piece – better too much than too little!
- Starting with the back signature, begin sewing from the middle hole.
- Follow a pattern: out through the middle, in through the top, out through the bottom, and back in through the middle.
- Move to the next signature and repeat the process, making sure to catch the previous signature’s thread as you go.
- When you’ve sewn all three signatures, tie off your thread with a secure knot.
Pamela’s sewing tip: Take your time and keep your stitches snug but not too tight.
You want your journal to open nicely!
How Do You Finish Your Junk Journal? 🎨
Congratulations!
You’ve now got the basic structure of your vintage junk journal.
But the fun doesn’t stop here.
Here are some of Pamela’s favorite ways to embellish and personalize your journal:
- Add pockets and tuck spots:
- Glue envelopes to pages
- Create corner pockets by folding and gluing triangles
- Use playing cards or postcards as mini pockets
- Create collages on the pages:
- Use vintage ephemera like old tickets or stamps
- Cut out images from magazines or old books
- Layer different papers for depth and interest
- Add tags and journaling spots:
- Use luggage tags or make your own from cardstock
- Create flip-outs for extra writing space
- Tuck in journaling cards for quick notes
- Embellish with washi tape, stickers, or stamps:
- Use washi tape to create borders or decorative elements
- Add vintage-style stickers for a nostalgic touch
- Use stamps and ink to create backgrounds or focal points
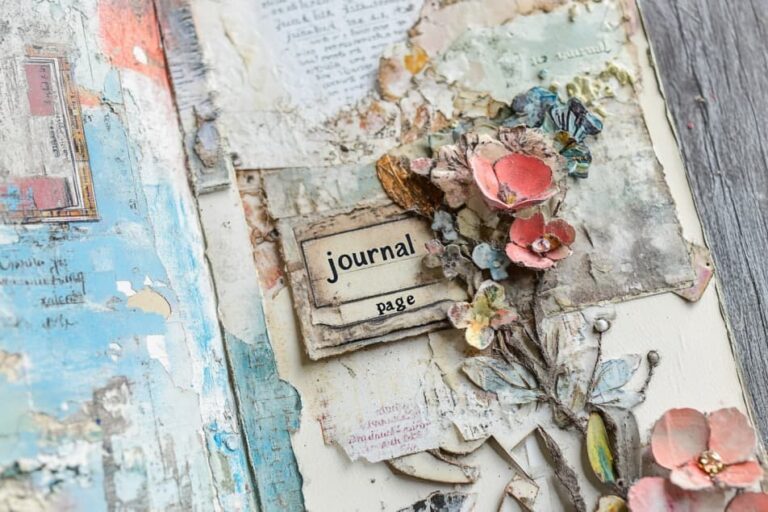
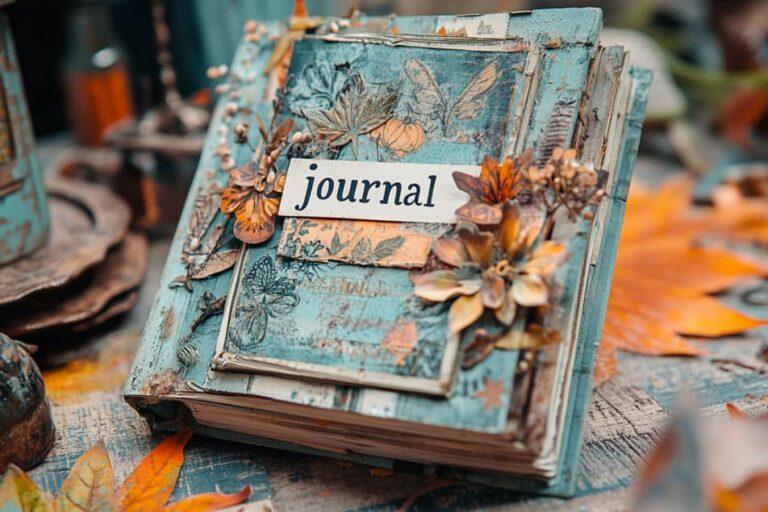
- Don’t forget the cover!
- Add a title using stickers, stamps, or your own handwriting
- Embellish with charms, ribbons, or fabric flowers
- Create a collage on the cover to hint at what’s inside
Pamela’s creativity boost: Don’t be afraid to experiment!
Try new techniques, mix unexpected elements, and most importantly, have fun with it!
What’s Next for Your Junk Journal? 🚀
Now that you’ve created your very own vintage junk journal, the possibilities are endless!
Here are some ideas to keep your creativity flowing:
- Use it as a daily journal or diary
- Create a travel journal for your next adventure
- Make a recipe book filled with family favorites
- Use it as a scrapbook for special memories
- Start an art journal to explore new techniques
Remember, there’s no right or wrong way to use your junk journal.
It’s all about expressing yourself and having fun with the process!
Final Thoughts and Encouragement 🌈
Creating a vintage junk journal might seem daunting at first, but as Pamela shows us, it’s really just a series of simple steps.
The key is to embrace the imperfections and let your creativity shine through.
Don’t worry if your first journal isn’t perfect – mine certainly wasn’t!
Each journal you create will teach you something new and help you develop your own unique style.
So, are you ready to dive into the wonderful world of vintage junk journaling?
I bet you are!
Grab that old book, pull out your crafting supplies, and let your imagination run wild.
Who knows what beautiful creations you’ll come up with?
Remember to share your junk journal journey with others – join online communities, post photos of your creations, and inspire others to give it a try.
The junk journal community is incredibly supportive and always full of new ideas and inspiration.
Happy journaling, everyone!
May your pages be filled with creativity, your signatures be strong, and your vintage vibes be on point.
Let’s get crafting! 📔✨🎨
Check out more junk journal tips and tutorials here: